
In 2019, the BearID Project received a grant from Microsoft’s AI for Earth program. This grant provides access to AI tools and Azure compute resources to advance our research in noninvasive techniques for monitoring brown bears. For the past year, we have been focused on developing our application using our local deep learning machine, otis, and writing our first paper on the project (more on the paper in a future post). Fortunately, the AI for Earth program has extended our grant for another year, and this time we are making use of it!
Microsoft Azure
The AI for Earth grant provides credits for Microsoft Azure. Azure includes a wide range of cloud services for building, testing, deploying and managing applications and services. Azure’s AI products range from low level infrastructure services, such as storage and compute, up to fully-managed Cognitive Services, such as speech translation and computer vision.
Computer Vision
The Computer Vision service provides powerful, pre-trained machine learning models for computer vision applications. With a simple API call, you can extract a wealth of context from any image without any knowledge of machine learning. The Computer Vision service already knows about “brown bears”, so we could use this to find bears in photos or camera trap video frames before sending them to the bearid application. You can test the API on the Computer Vision webpage. Testing with one of our images, F011 – GC and cub from Glendale Cove, we received the following results.

The API returns the extracted context in a JSON structure. Examples are provided in a wide array of languages, including Python.
Pricing for the API varies depending on a number of factors (compute region, feature context and calling frequency), ranging anywhere from free (20 transactions per minute up to 5,000 per month) to $2.50 per 1000 images (10 transactions per second for full text description or text recognition). While the Computer Vision APIs are easy, powerful and cost effective (depending on your application), they are fixed function.
Custom Vision
If you have a classification or object detection computer vision problem that is not covered by the Computer Vision APIs and you have data to train a model but you don’t want to mess around with virtual machines, then the Custom Vision service might be right for you. This service lets you build and deploy your own image classifiers and object detectors in a few easy steps:
- Create a project
- Upload and label your dataset
- Train and test a model
- Deploy the model
You can utilize this service through the web portal or programmatically, using the Custom Vision SDK in your language of choice. For a quick test, I used the web portal to create a classifier to identify a subset of bears using the bear face chip images.
Creating a Custom Vision project
In the bearid application, we find, extract and normalize the bear faces we find in images (see Bear (C)hipsterizer). We have a set of these face chips as 150×150 pixel JPEGs. As a start, I followed the instructions in Quickstart: How to build a classifier with Custom Vision to create a classifier for 10 bears in our dataset. I created a new project with the following parameters:
- Name: id-test-10
- Project Type: Classification
- Classification Type: Multiclass
- Domains: General
Uploading and Labeling the Dataset
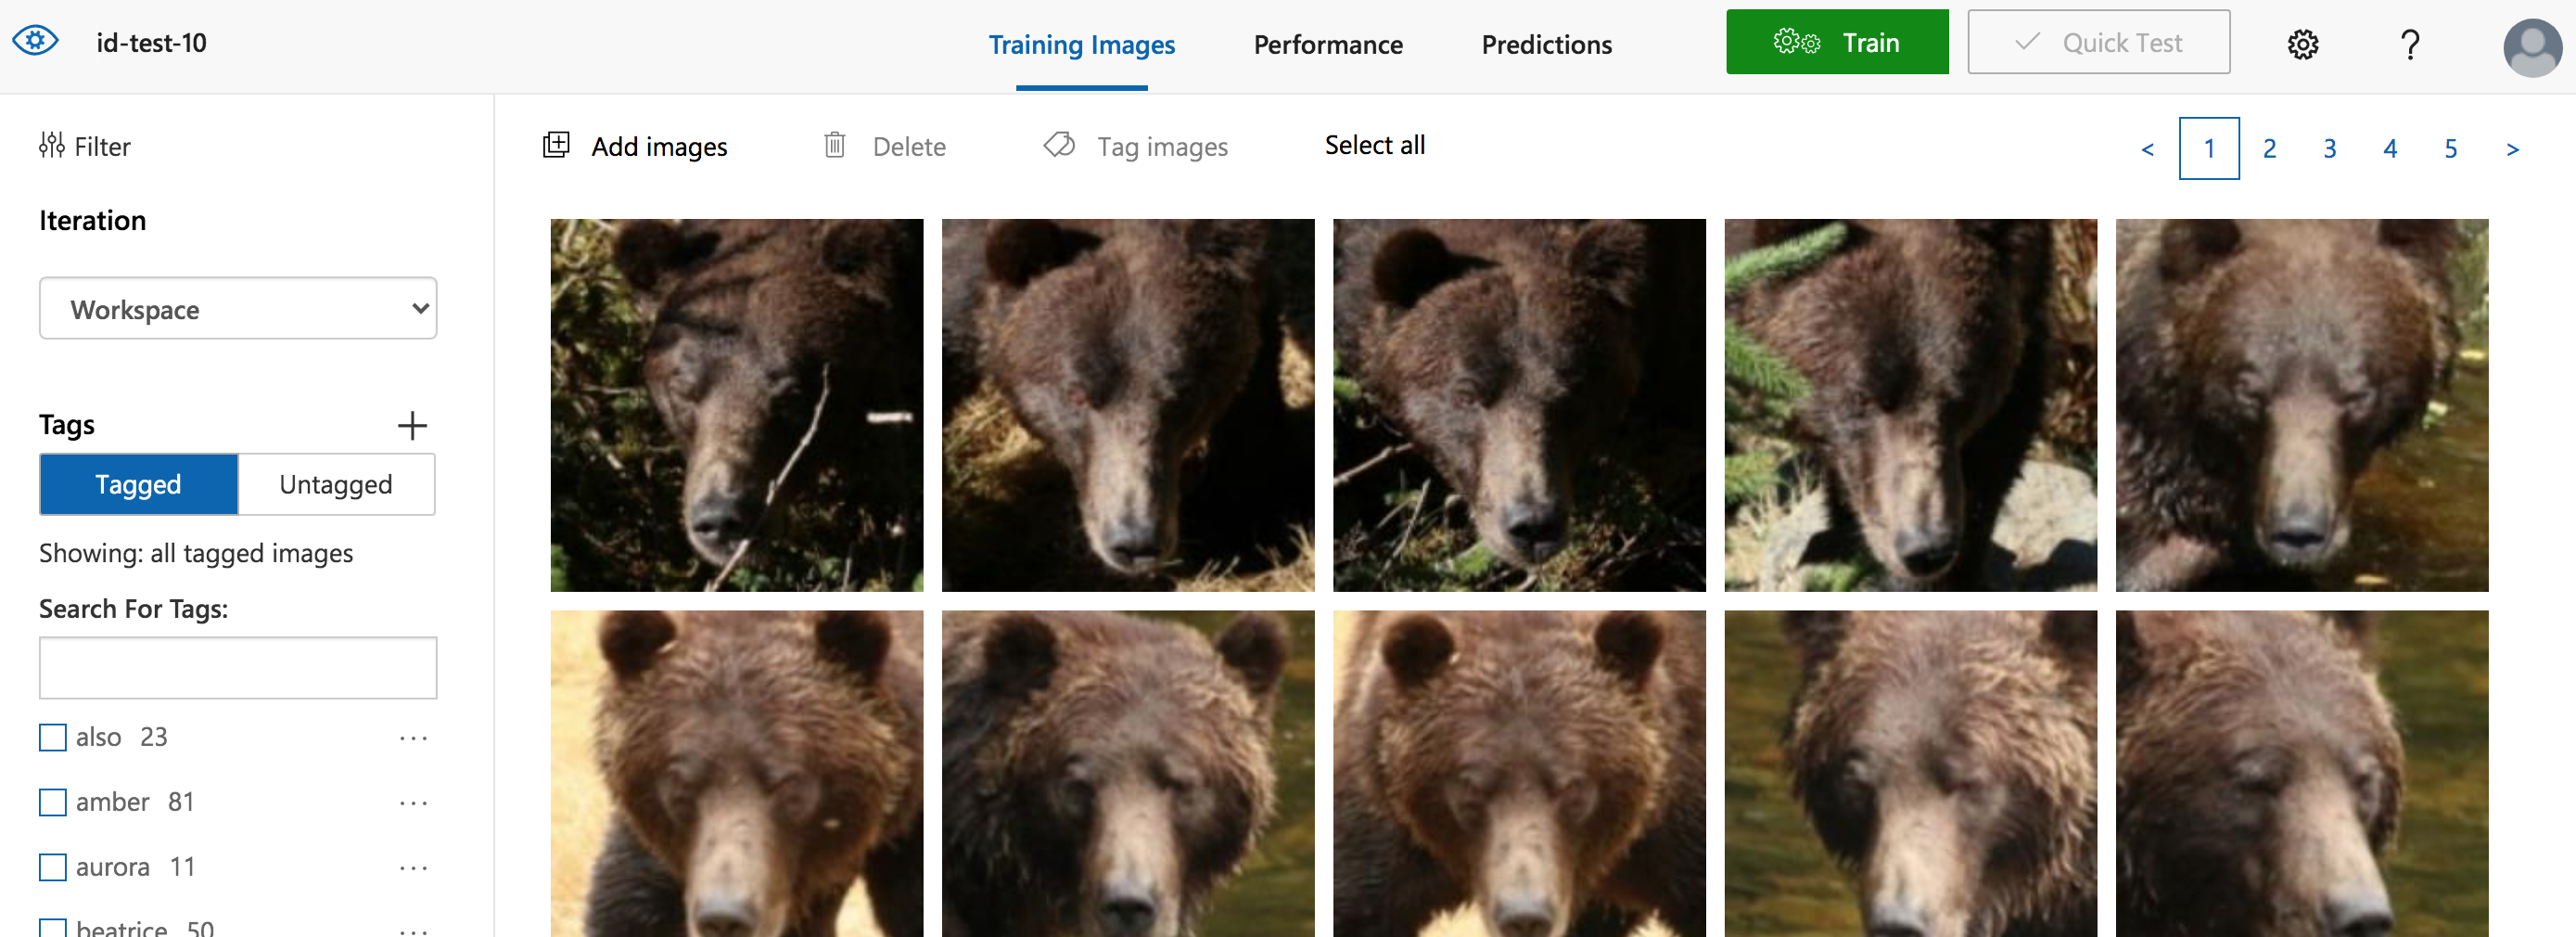
The next step is to upload and label the dataset. I used “Add Images” and selected all the face images for a single bear. In the “My Tags” (aka labels) field I entered the identification of the bear (e. g. amber, bella, etc.). I did this for 10 bears from our dataset, resulting in the screen capture shown above. In this “Training Images” tab, you will see all the images with the tags and counts on the left.
Training and Testing the Custom Model
Now it’s time to train the model. Click the green “Train” button. In this case I used “Quick Training” just to see some results. In less than a minute it was done. On completion, the page automatically switched to the “Performance” tab showing the model performance using cross-validation data.

You can see that even with less than 1 minute of training we are getting >80% on precision, recall and AP. By default, these numbers are shown using a “Probability Threshold” of 50%. There is a slider at the top of the left-hand pane which you can use to vary the threshold.
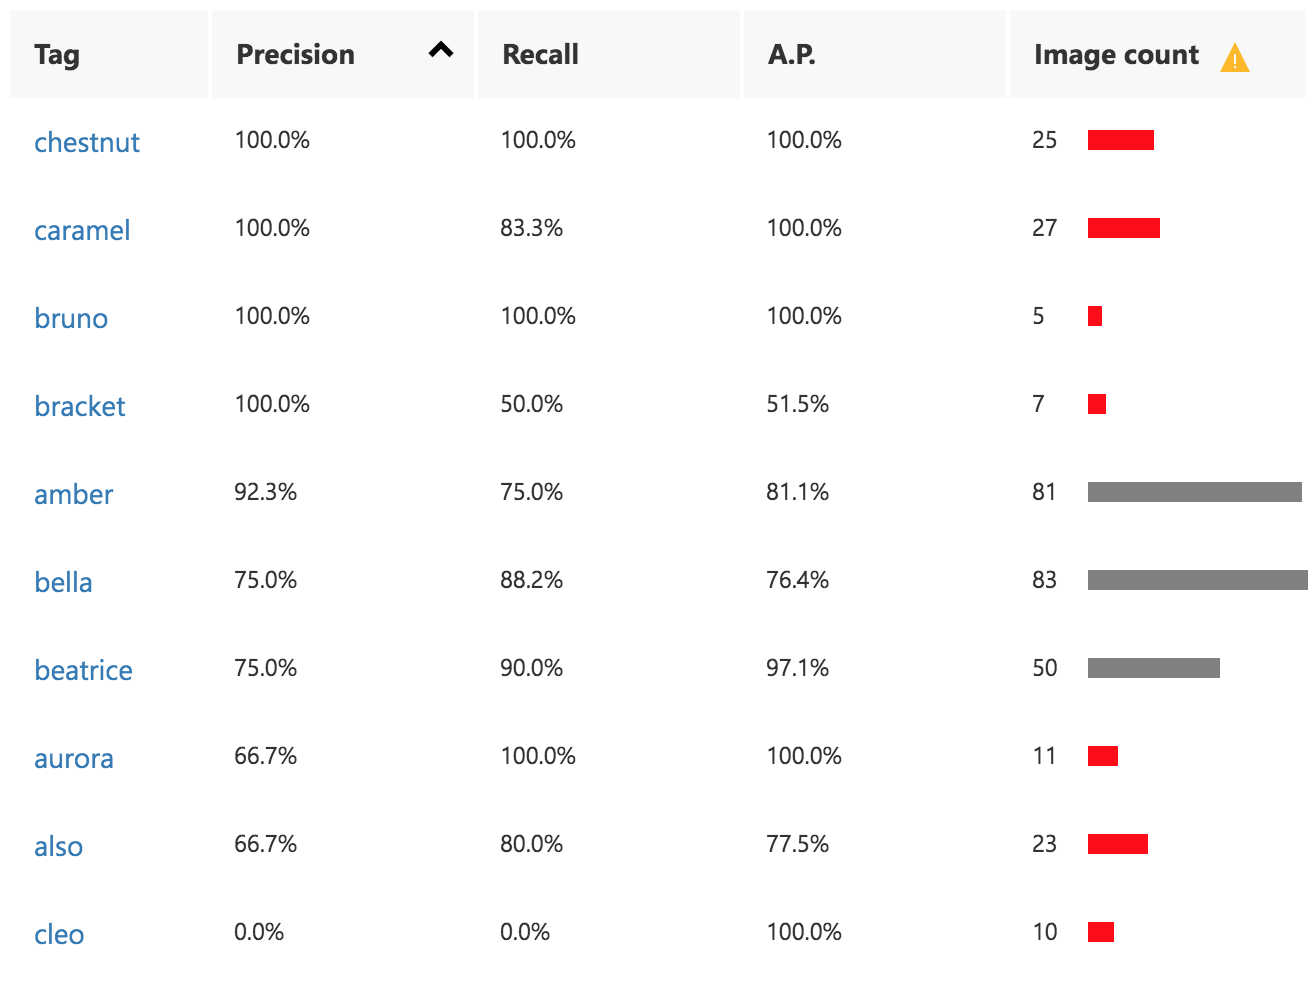 Beneath the general results you can find the “Performance Per Tag” (see image to right). Notice a warning icon by the “Image count” heading. Mousing over the icon brings up a message stating:
Unbalanced data detected. The distribution of images per tag should be uniform to ensure model performance.
You can also see a number of the image count bars are red. Mousing over these shows the following message:
We recommend having at least 50 images per tag to ensure model performance.
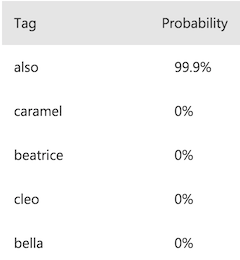
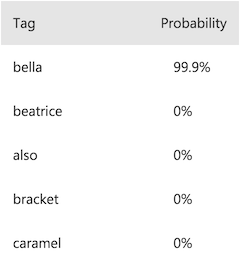
Clicking on a “Tag” link will show you which images were used for cross-validation for that tag and if they were classified correctly or not. Clicking on an image within that cross-validation set will show you the classification results for that image. For example, here are the results of two images on the bear “Also”, one is correctly identified by the model, and one incorrectly identified as Bella:
| Correct | Incorrect |
|---|---|
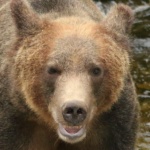 | 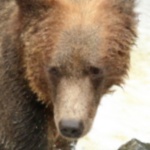 |
 |  |
Now would be a good time to add images to the data set to correct the imbalanced data and insufficient images per tag. We can then train new iterations using the “Quick Training” again, or we can specify a time budget (currently pricing is $20 per compute hour). I’ll skip this for now.
Deploying the Custom Model
The final step is to deploy the model. Deploying is as simple as clicking the “Publish” button on the “Performance” tab. You can further test you model on the “Prediction” tab using “Quick Test” then uploading an image or entering a URL. You can choose to add these additional images to the dataset for use in subsequent training iterations. Once you have published a trained iteration, the Custom Vision service will generate an API. You can get the Prediction URL and Prediction Key (needed when you call the API) by clicking the “Prediction URL” button. You can now call this API from your application in the your language of choice. The API will return a JSON string containing the results, similar to the Computer Vision API described earlier.
Conclusion
In less than 30 minutes and for a few dollars (depending on your dataset; or for free on a Free Tier), you can train and deploy a Custom Vision model without writing a single line of code. For reference, it took me longer to write this blog than it did to perform all the steps on the Custom Vision portal! If you have a lot of data, you may find using the web portal a bit tedious. At this point you probably want to start using the Custom Vision SDK. In the next installment, I’ll take a look at implementing a bear ID classifier and bear face object detector using the SDK.
Until net time, SBD.
Pingback:Object Detection with Azure Custom Vision – BearID Project