
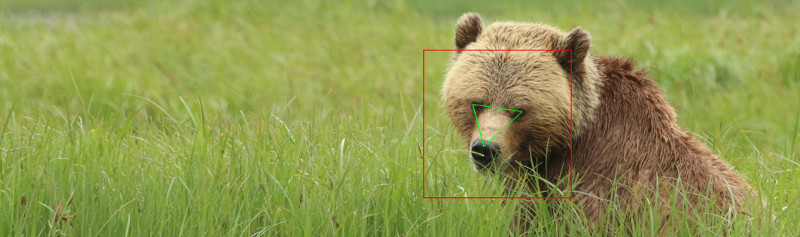
Happy Halloween! The bears at Brooks Falls may have had their fill of salmon this year, but that doesn’t mean they are passing up any opportunities for more! Trick or treat!

In my previous post, No-Code Image Classification with Azure Custom Vision, I introduced the Microsoft Azure’s Cognitive Services for vision. More specifically, I described how the BearID Project could use Azure Computer Vision as a brown bear detector through an API. I also went into some detail on how to use Azure Custom Vision to build an image classifier without writing a line of code.
This time I’ll talk about using the same service to build an object detection model, similar to our current bearface program. Like with classifiers, you can utilize this service through the web portal or programmatically, using the Custom Vision SDK in your language of choice. I will mainly focus on the Custom Vision SDK for Python, although we’ll have a look at a few web portal features as well.
Bearface using Custom Vision
In the bearid application, we use an object detector, bearface, to find bear faces in images, as well as identify the eyes and nose (see Bear (C)hipsterizer). Azure Custom Vision does not support finding landmarks like the eyes and nose, so we will only worry about finding the faces. Following the Quickstart: Create an object detection project with the Custom Vision client library, we will use the Python SDK do the following:
- Create a new Custom Vision project
- Add tags to the project
- Upload and tag images
- Train the project
- Publish the current iteration
I ran everything on my local Linux machine, otis, but you can also run this in a cloud instance. To get started, see the Quickstart guide and follow the prerequisites and Setting up sections.
Create a new Custom Vision project
Setting up walks you through the creation of variables containing various resources and subscription keys. Use those variables to set up trainer and predictor credentials:
credentials = ApiKeyCredentials(in_headers={"Training-key": training_key})
trainer = CustomVisionTrainingClient(ENDPOINT, credentials)
prediction_credentials = ApiKeyCredentials(in_headers={"Prediction-key": prediction_key})
predictor = CustomVisionPredictionClient(ENDPOINT, prediction_credentials)
Next we need to set up the project type (ObjectDetection) and domain (General) for the model we will create. Then we can create the project:
obj_detection_domain = next(domain for domain in trainer.get_domains() if domain.type == "ObjectDetection" and domain.name == "General")

print ("Creating project...")
project = trainer.create_project("face-resize", domain_id=obj_detection_domain.id)
Custom Vision supports the following domains for object detection: General, Logo, Products and Compact. Pick the domain that most closely matches your use case. For example, if you are looking for your company logo in images, use the “Logo” domain. The “Compact” domain is optimized for edge devices. I will explore compact models in a future post. If none of the other domains are appropriate, select “General”. For more information on domains, see Select a domain for a Custom Vision project.
Add tags to the project
Tags are the same thing as labels. In object detection, there is a tag for each type object to be detected (e. g. car, person, bicycle, etc.). You need to create a tag for each type of object in your dataset. For this project, we are only aiming to detect bear faces, so we only need to define one tag which we’ll call bear:
bear_tag = trainer.create_tag(project.id, "bear")
Upload and tag images
Now we need to upload the dataset to Azure Custom Vision. Our dataset has 3730 images of bears with each bear face identified with a bounding box. You can upload and label the data using the web portal, much like I did in the previous classification example. In fact, the Custom Vision interface can provide suggestions for bounding boxes for many common objects (including bears!). Still, labeling 3730 images takes time, and I already have the data labeled. I will upload the images and labels using code.
There are many different formats for data labels. For bearid, we use a format defined by dlib’s imglab tool. The XML file for one image looks something like this:
<dataset>
  <images>
    <image file="image.jpg">
      <box height="200" left="1172" top="1059" width="200">
        <label>bear</label>
        <part name="leye" x="1324" y="1132" />
        <part name="nose" x="1279" y="1197" />
        <part name="reye" x="1246" y="1133" />
      </box>
    </image>
    <image file="/home/data/bears/imageSourceSmall/britishColumbia/melanie_20170828/bc_bellanore/IMG_5878.JPG">
      <box height="211" left="593" top="462" width="211">
        <label>bear</label>
        [...]
      </box>
    </image>
    [...]
  </images>
</dataset>
Mainly, we care about the image file and box information. In our case, all the label entries are bear, which we have already defined as our tag. As I mentioned before, we will not be utilizing the landmarks (eyes and nose), so we can ignore all the part items. To access the XML data, we use the ElementTree XML API. We have a utility library xml_utils, which helps us with parsing the XML. I have bearid cloned at ~/dev/bearid. Let’s import xml_utils and a few other common libraries:
import sys
sys.path.append('~/dev/bearid/tools')
import xml_utils as x
from collections import defaultdict
from PIL import Image
Now we can read in the XML file and load the objects from it using the load_objs_from_files function in xml_utils.
objs_d = defaultdict(list)
x.load_objs_from_files(['faceGold_train_resize.xml'], objs_d, 'faces')
The Custom Vision API allows you to upload images in batches of 64. So lets set up a constant for the batch size and keep track of the current image_list and image_count:
MAX_IMAGE_BATCH = 64
image_list = []
image_count = 0
The next block of code is the largest (and messiest) part of this example. It could certainly be cleaned up by defining some functions. Here’s what is does:
- Loop through labels (
keyis the label, in this case there is onlybear) - Loop through all the
objsfor onekey(anobjin this case is an image) - For each image, get the image file with all the tags and all the bounding boxes
- Upload batches of images for each label
Here’s the code:
# loop through all the labels and get their corresponding objects
for key, objs in list(objs_d.items()) :
    obj_count = 0
    obj_size = len(objs)
    # loop through objects (images) for each label
    for obj in objs :
        image_count += 1
        obj_count += 1
        file_name = obj.attrib.get('file')
        img = Image.open(file_name)
        width,height = img.size
        regions = []
        # find all the regions (bounding boxes)
        for box in obj.findall('box') :
            # find the bounding box coordinates
            bleft = int (box.attrib.get('left'))
            btop = int (box.attrib.get('top'))
            bheight = int (box.attrib.get('height'))
            bwidth = int (box.attrib.get('width'))
            # add bounding box to regions, and translate coordinates
            # from absolute (pixel) to relative (percentage)
            regions.append(Region(tag_id=bear_tag.id, left=bleft/width,top=btop/height,width=bwidth/width,height=bheight/height))
        # add object to the image list
        with open(file_name, "rb") as image_contents:
            image_list.append(ImageFileCreateEntry(name=file_name, contents=image_contents.read(), regions=regions))
        # if this is the last image or if we hit the batch size
        # then upload the images
        if ((obj_count == obj_size) or ((obj_count % MAX_IMAGE_BATCH) == 0)):
            upload_result = trainer.create_images_from_files(project.id, ImageFileCreateBatch(images=image_list))
            if not upload_result.is_batch_successful:
                print("Image batch upload failed.")
                # if the errors was a duplicate, keep going; otherwise exit
                for image in upload_result.images:
                    if ((image.status != "OKDuplicate") and (image.status != "OK")) :
                        print("Image status: ", image.status)
                        exit(-1)
            image_list.clear()
            obj_count = 0
            obj_size -= MAX_IMAGE_BATCH
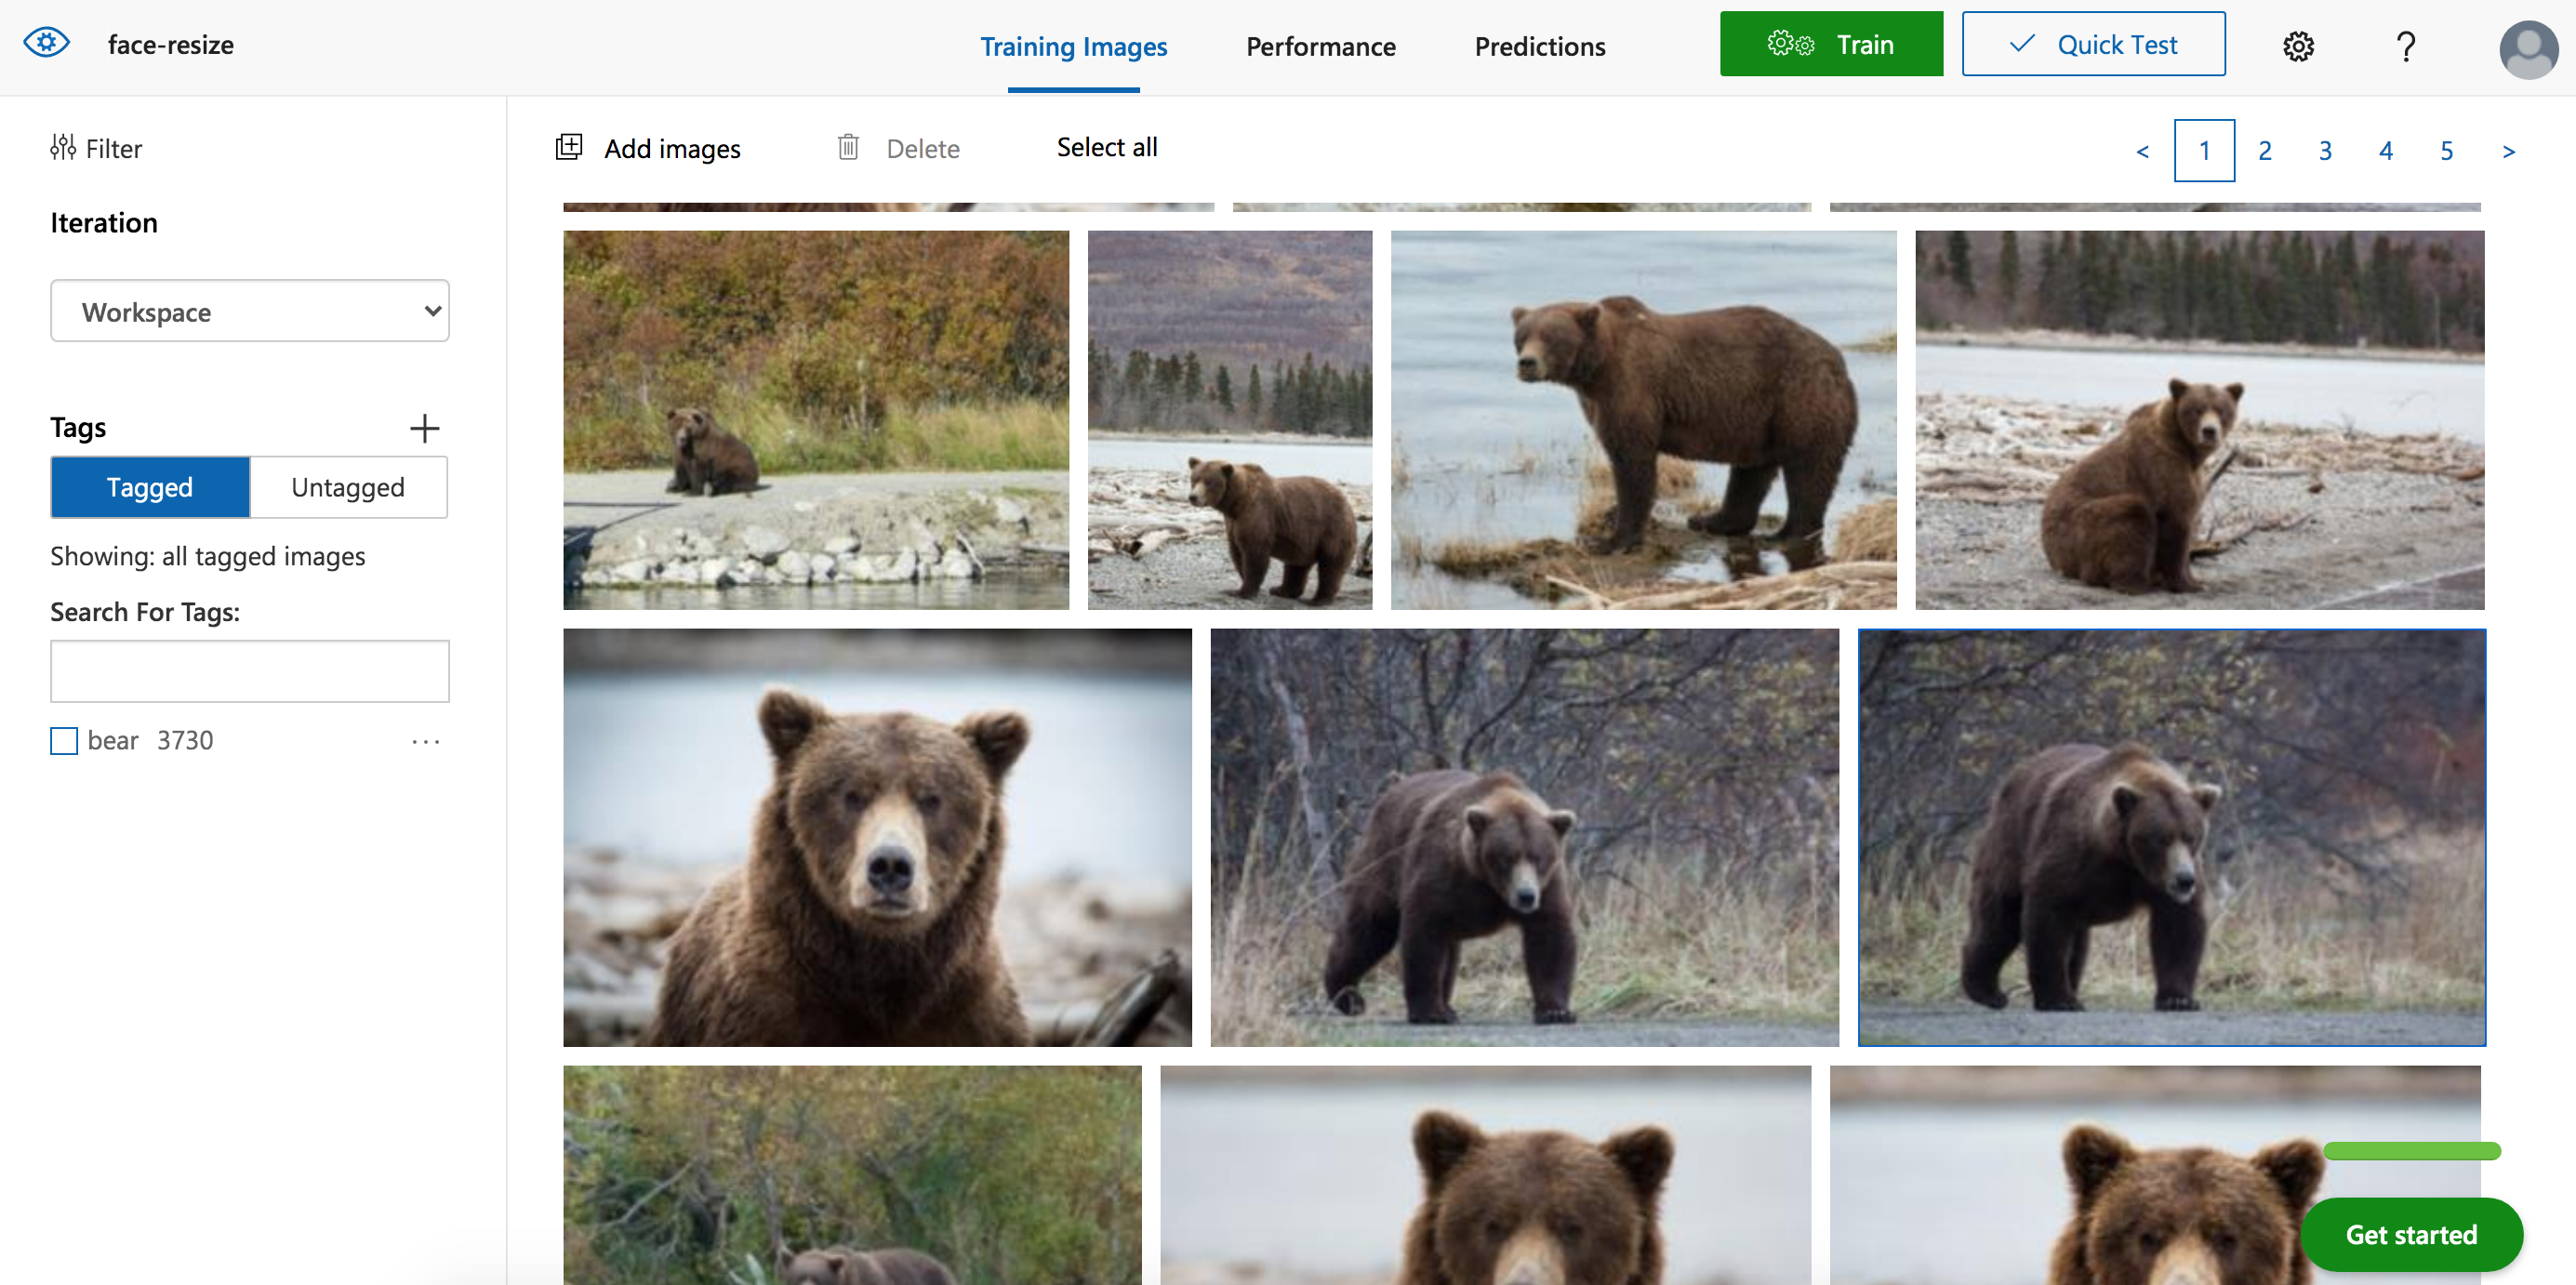
You can view your labeled dataset in the web portal:
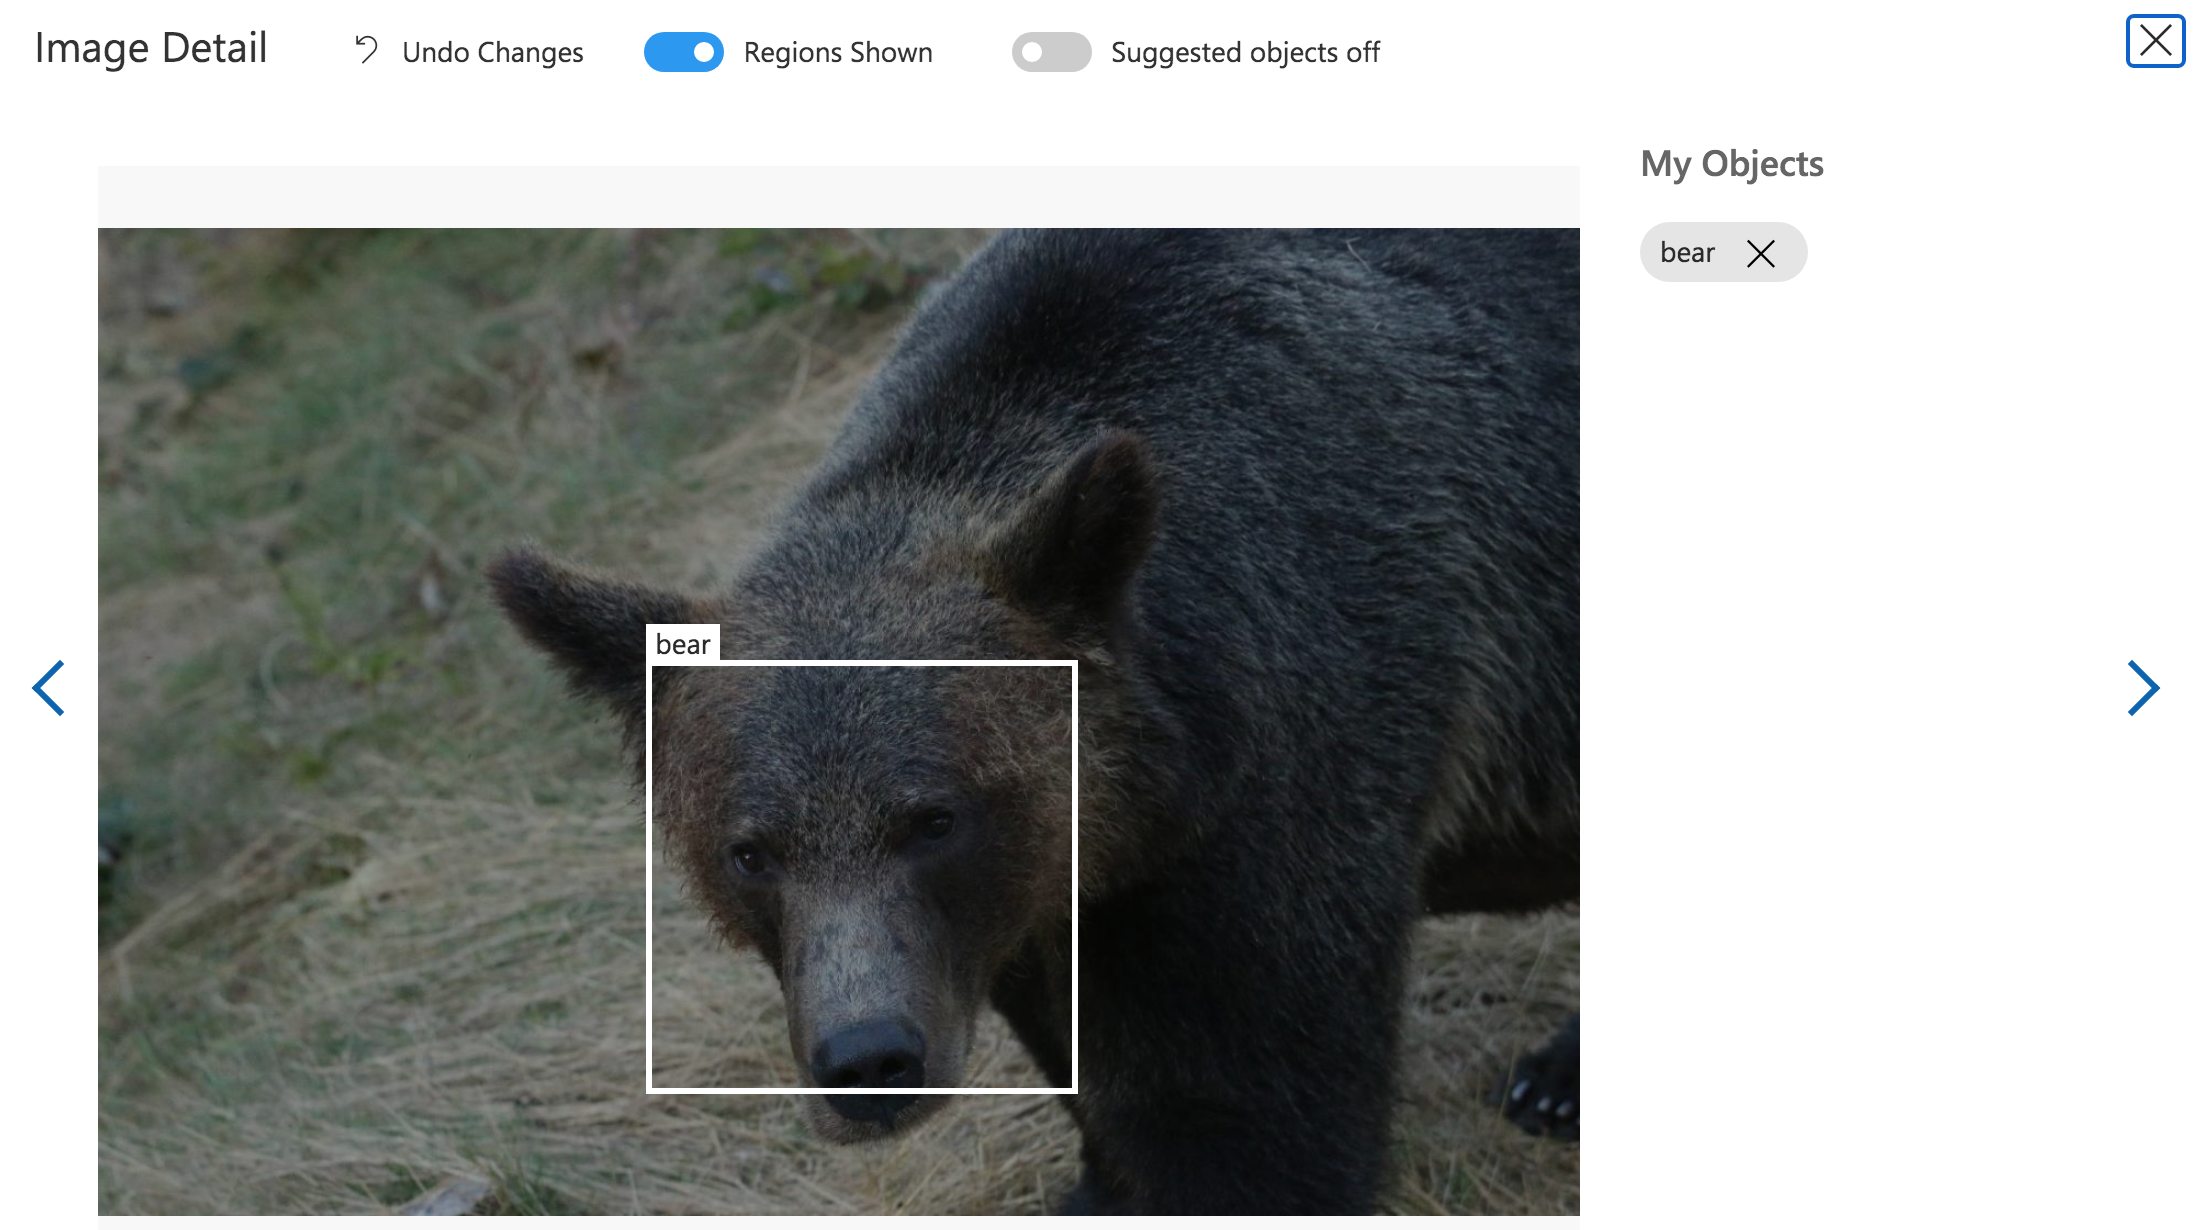
You can also use the web portal to edit your labels as needed.
Train the project
Once your dataset is ready, you can set up your trainer and loop through the training iterations. A sleep command is added to wait for some time during each loop.
import time
iteration = trainer.train_project(project.id)
while (iteration.status != "Completed"):
    iteration = trainer.get_iteration(project.id, iteration.id)
    print ("Training status: " + iteration.status)
    time.sleep(1)
Alternatively, you can run the training using the web portal, much like in the classification example.
Once training is complete, you can see the cross-validation performance on the web portal:
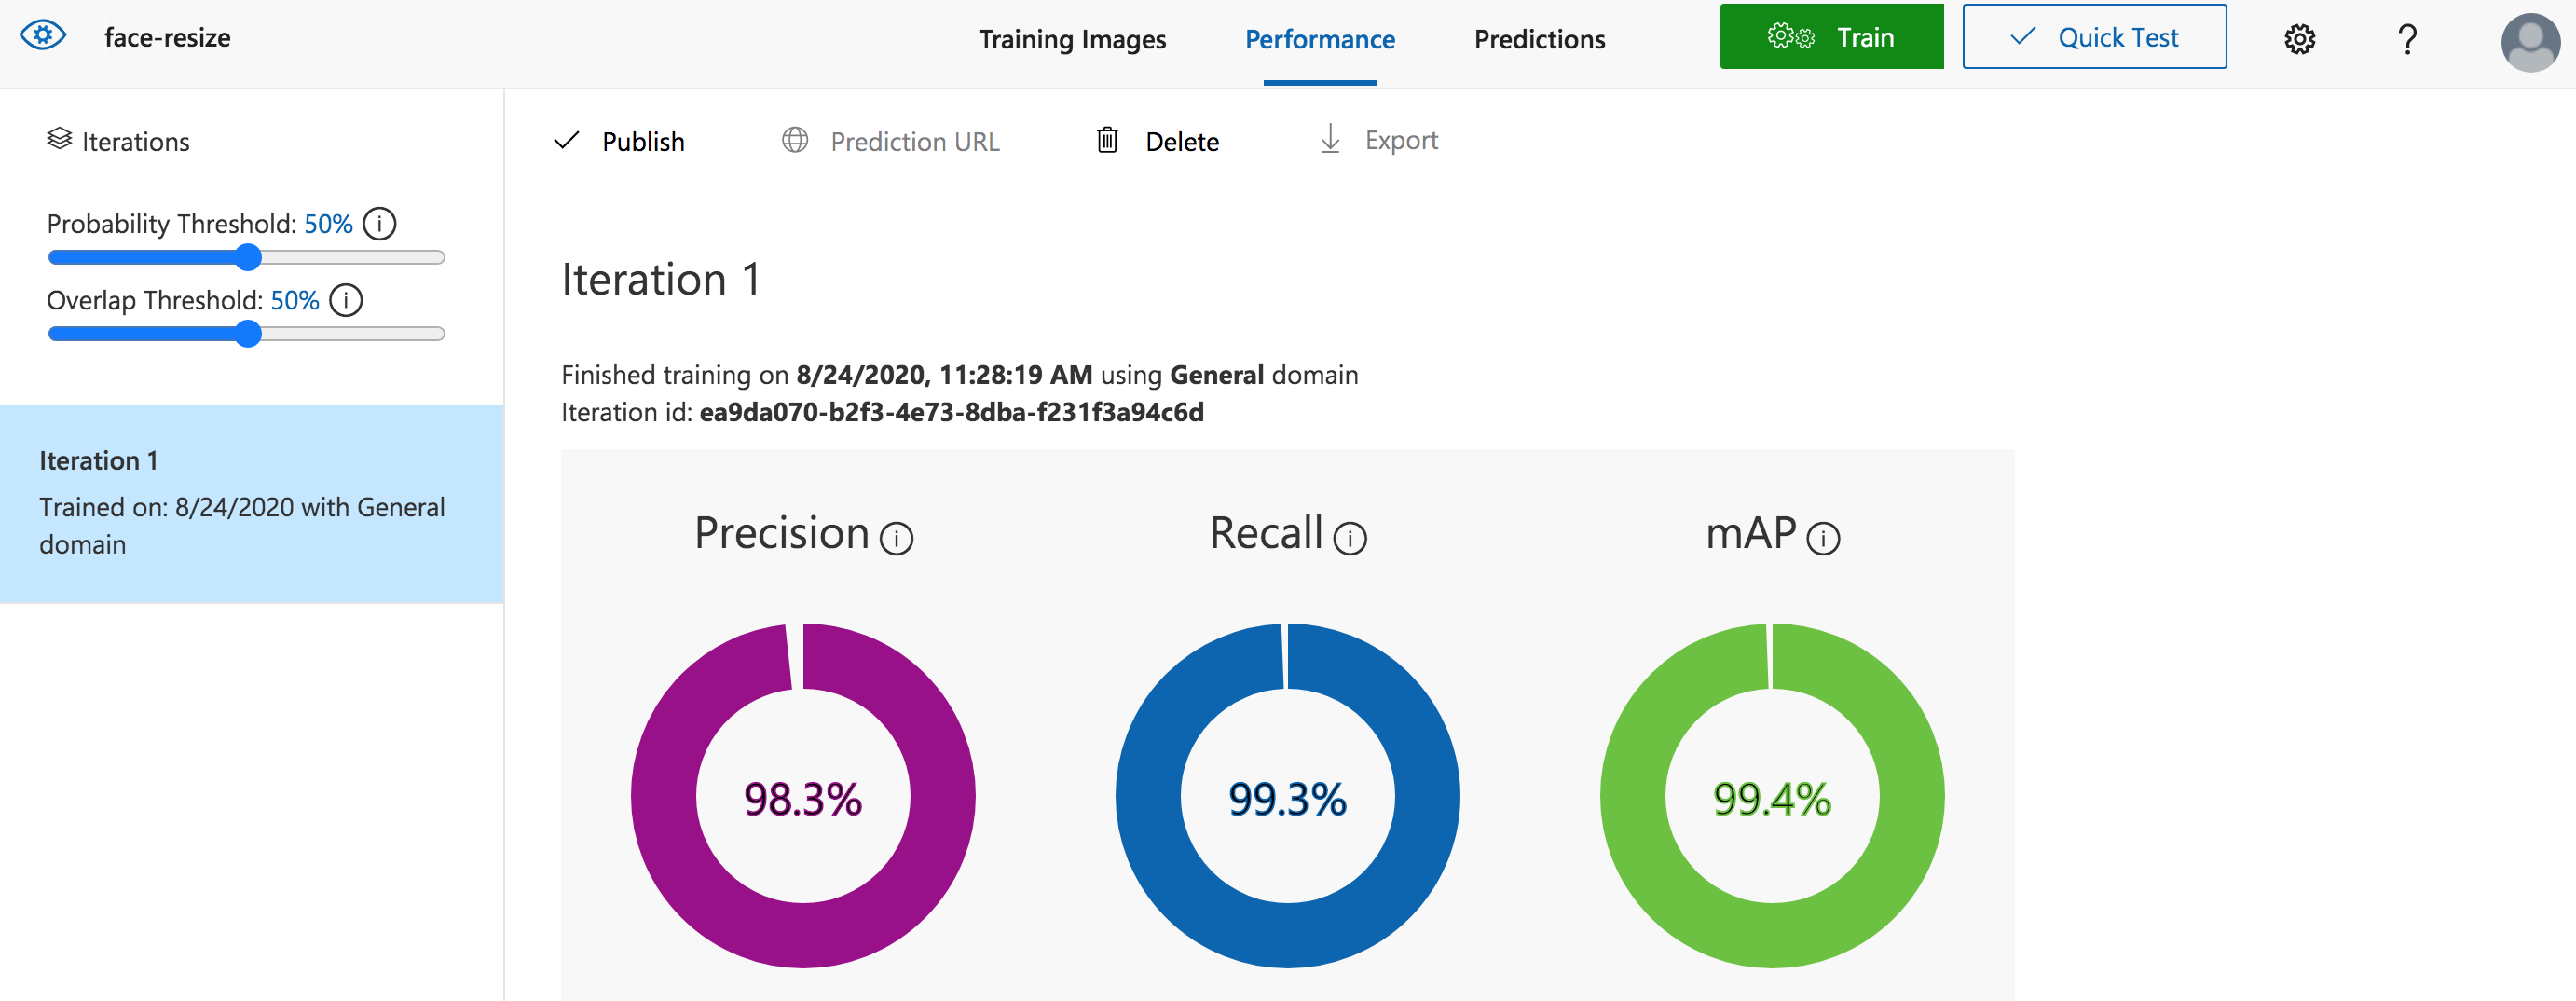
In this case, for a probability threshold of 50% and an overlap threshold of 50%, we are getting 99.4% mean Average Precision. Since we have only one label, bear, the Average Precision for it is also 99.4%.
Publish the current iteration
Once you are happy with your trained model, you can publish it. Publishing makes it available as a prediction endpoint which can be called from your SDK based code. Publishing is a matter of naming your iteration and calling the publish_iteration function.
publish_iteration_name = "bearfaceModel"
trainer.publish_iteration(project.id, iteration.id, publish_iteration_name, prediction_resource_id)
Conclusion
Azure Custom Vision is a quick and easy way to build and deploy classification and object detection models. The web portal provides a no-code way to experiment with you dataset, but if you want to implement something more significant, the Custom Vision SDK is the way to go. In under 100 lines of code, you can use your favorite language to upload and label data, train a model and publish it as a prediction endpoint.
Until net time, SBD.
Can you make your prediction endpoint available? If a have a photo which identifies a bear, I could use that as a secondary detector to find the bear face. Lastly, the bear face could be passed to a tertiary detector to identify it.
My project is to have my ipcams watch for deer, raccoons, foxes and other animals and I too use Azure CV for my object detection.
Thank you for the comment. Your idea makes a lot of sense, and is pretty much what we are doing with our own camera traps. However, due to a limited budget for Azure, we are not currently planning to share the prediction endpoint publicly. Also, our current Azure model can only identify a subset of the bears in our study set.
We do hope to roll out some public solutions in the future, so keep checking back. Best of luck with your project!